Navigating The World Of Fishfinders
Even a blind squirrel gets a nut once in a while. If you haven’t yet equipped your kayak with a fishfinder, then you’re that blind squirrel. Sure, you may be catching some fish, but you’re definitely limiting your potential.
Granted, selecting the right finder for your kayak can be a daunting task. There are so many units on the market today, with a myriad of features you may not have even heard of, much less considered. So before laying your money down, set a budget, evaluate your needs for the different options and do a little research focusing on the features that will deliver the biggest bang for your buck.
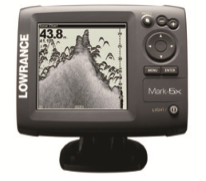
IN ITS SIMPLEST form, a fishfinder provides a graphical representation of the water-filled region between your kayak and the bottom. It allows you to measure the distance to the bottom and yields crude information on objects such as fish, structure or debris suspended below you.
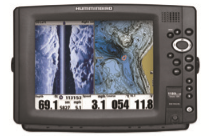
At its most complicated, a fishfinder can display multiple high-definition images of the objects both beneath and to the sides of you, while also providing a wide range of ancillary information such as weather updates, tide information and GPS positioning on a detailed bottom contour map.
Let’s break the main features down:
Screen size: Screen size will have one of the biggest impacts on the price of a fishfinder. Units with a 3.5-inch display and 320×240-pixel resolution start at just under $100. These models are great for monitoring your depth when trolling for bottom-hugging Chinook or bouncing jigs for offshore lingcod and cabezon, but lack the detail necessary to resolve the difference between suspended baitfish and debris or the subtle change in bottom composition from gravel to rock.
If your budget allows, spend the additional $100 to upgrade to a 5-inch display with 480×480 resolution. Screens of this size are much easier to read and deliver three times the detail. You can find models with larger displays, but they take up a lot of deck space and have a commensurately larger price tag.
B&W vs. color: Black-and-white displays provide valuable feedback on the density of objects and structure by displaying them in varying shades of grey. Color displays allow you to more easily discern that density with a quick glance. This is especially helpful when fishing structure or searching for changes in bottom composition.
GPS: Adding GPS to a given display size will generally add about $100 to the purchase price. It will also add the ability to mark and later find important locations, such as crab pots or prime fishing structure. GPS isn’t a necessity, but it certainly is nice to have.
Navionics: Often sold as an add-on, Navionics chips create a topographical
overlay on your GPS map, complete with detailed bottom contours for rivers, lakes and offshore reefs. A Nav chip might be well worth its $300 to $500 price tag if you like to explore new areas, as it will allow you to immediately key in on target structures or depths. If the price doesn’t fit your budget, you can add waypoints to your simple GPS map based on online NOAA charts.
Down-imaging and side-scanning: Once prohibitively expensive, high- resolution down-imaging and side- scanning sonars are rapidly becoming standard equipment on several makes of fishfinders. Both tools create higher definition “images” of objects in the water. While not quite photographic, the images offer a much more intuitive representation of what lurks beneath the surface, whether it be fish, structure or bottom contours. If you’re an avid bass fisherman, these technologies can be game changers.
The one drawback is the size of the transducers and need to mount them externally. While standard sonar transducers can be mounted in a scupper hole, epoxied to the inside of the hull or wedged into a water-filled foam cup inside the hull, down-imaging and side-scanning transducers must be mounted below the hull in order to operate effectively.
ONCE YOU’VE CHOSEN a fishfinder, it’s time to find an appropriate 12-volt battery. In general, the more features that your new fishfinder has, the more power it will consume per hour, and thus the more amp hours your battery will need to provide.
Here’s a simple calculation that will aid in selecting the correct battery. The number of hours that you can run your finder will be equal to the number of amp hours (Ah) your battery is rated for, divided by the power usage (U) of your unit. So, run time = Ah/U.
Say you have a small black-and-white unit with no GPS that draws about 200ma of power (.2 amps). If you run this unit on a fresh 12-volt, 4Ah lead-acid battery, you can fish for nearly 20 hours on a charge. In this equation, 20=4/.2.
But say you have a 5-inch color unit with GPS and backlight that draws about 850ma of power (.85 amps). If you run this unit on the same battery, you can fish for only 4.7 hours on a charge. In this, 4.7=4/.85
Until recently, battery choices were limited to either lead-acid or gel cel batteries, both of which are very heavy and bulky (think

motorcycle or UPS batteries). While these are still solid choices, the proliferation of lithium ion batteries has provided kayak anglers with a much smaller and profoundly lighter option. Often sold as charging units for personal electronics, the new LiPo and
LiFe batteries with 12-volt outputs work very well with fishfinders.
The one thing to keep in mind when selecting lithium batteries is that they have an approximately 30 percent power loss when running at 12-volt. This can be factored into the calculation above by modifying the formula to: Run time = (Ah*.7)/U, or run time is equal to 70 percent of the stated amp hours divided by the power usage of the fishfinder.
Even if your eyes glazed over with all this math, with a fishfinder, once you see what you’ve been missing, you’re likely to realize that you’ve been running right past an orchard every day in a blind search for your nut.

Just one safety note to mention: Don’t skip installing a 3-amp fuse in your power supply. While highly unlikely, it is possible that a short could cause your battery to leak, ignite or even explode. NS
Article by Mark Veary
